1. Open the SiteCam mobile app
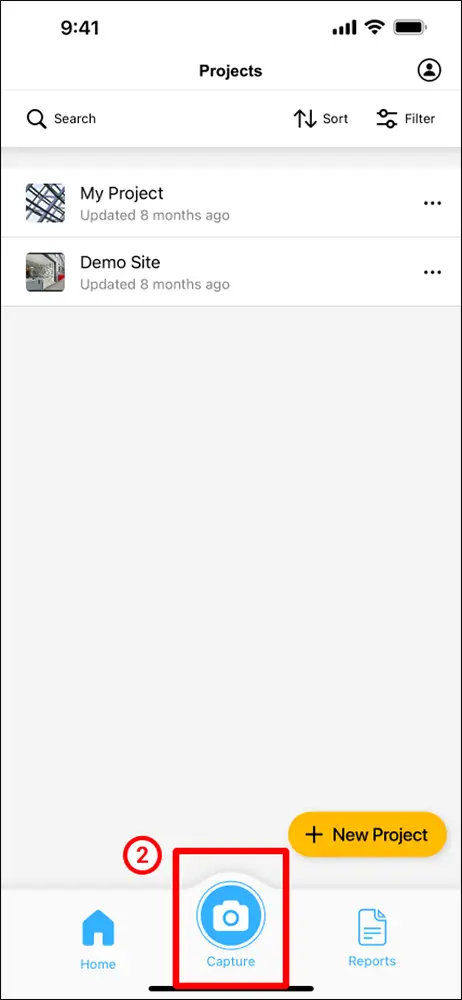
2. Tap on the Capture button to go to the camera screen.
3. Point the phone camera at the subject and press the shutter button. You can also load photos from your camera roll by pressing the icon on the bottom right.
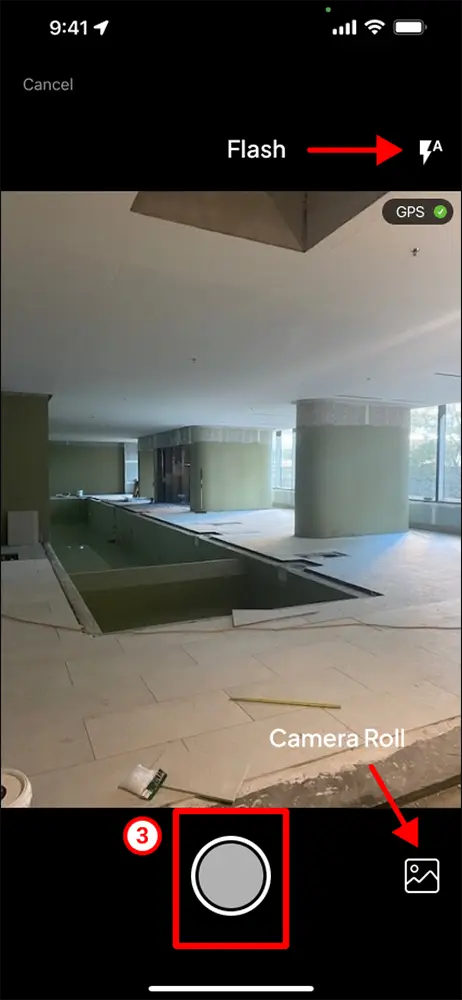
4. If you need to capture more photos, simply press the shutter button multiple times or load multiple photos from the camera roll.
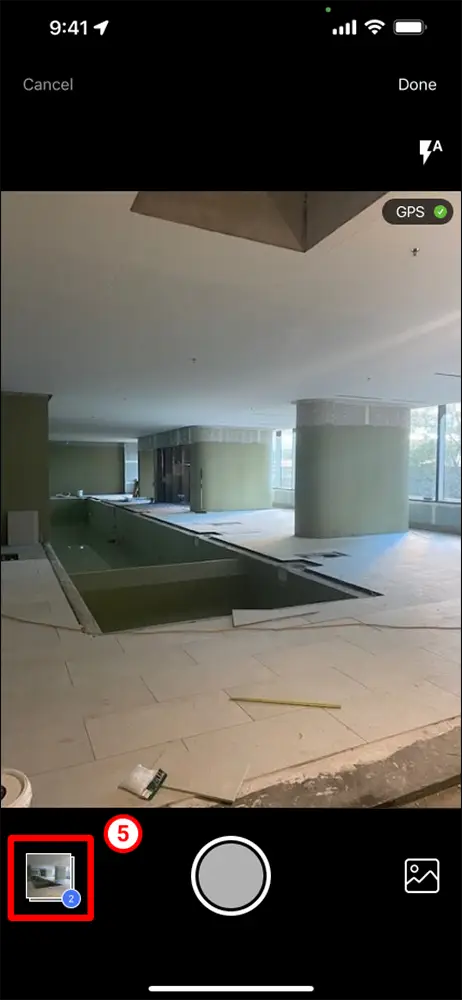
5. Preview your photos by tapping on the preview thumbnail on the bottom left.
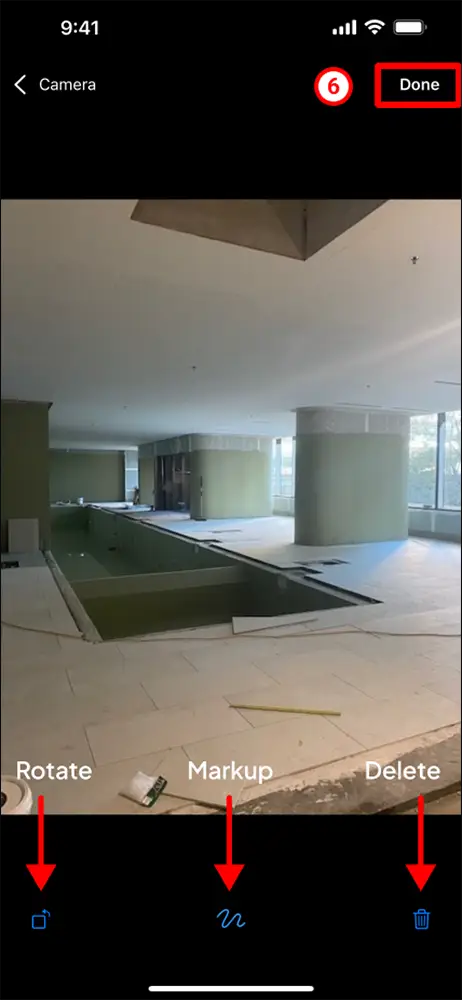
On the photo preview screen you can:
- Swipe left/right to preview the photos you took.
- Rotate a photo.
- Markup a photo.
- Delete a photo.
6. When you are ready to proceed, press the Done button at the top right of the screen.
7. Next, select the project that you want to save the capture to. It will default to the last project that was modified or the project that you accessed the camera screen from.
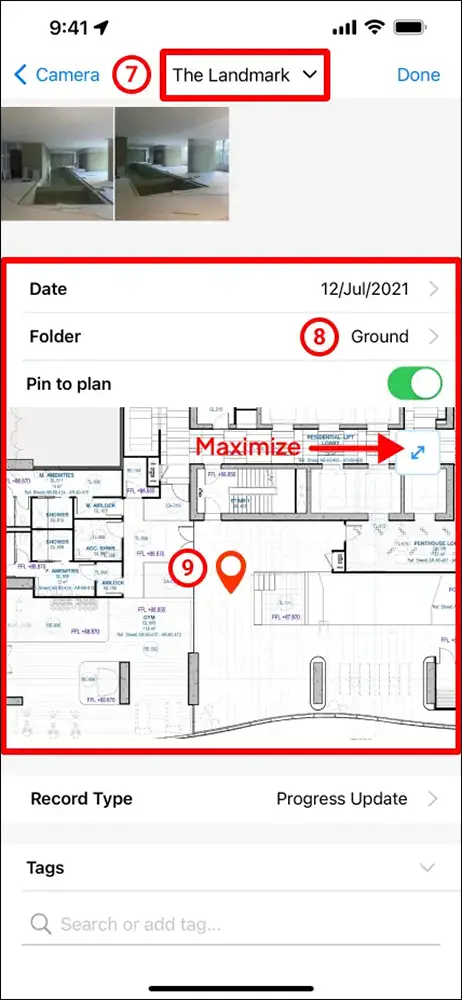
8. Select a folder to save the photo to. If you select a folder that has a plan attached to it, you can enable the “Pin to plan” toggle to show the plan.
9. Drag the pin icon on the plan to specify where the photo was captured.
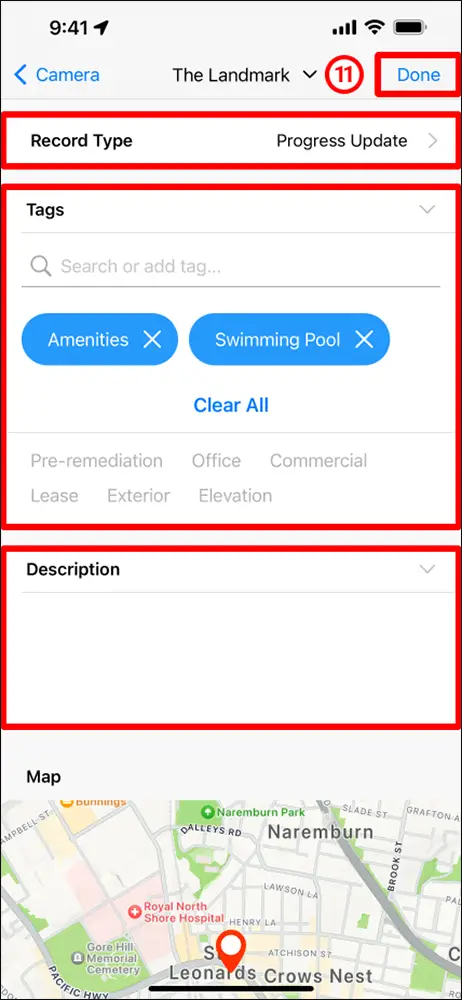
10. Next, specify a Record Type, add some Tags and a Description.
11. Press the Done button to complete the capturing process. Leave SiteCam open until uploads have completed.