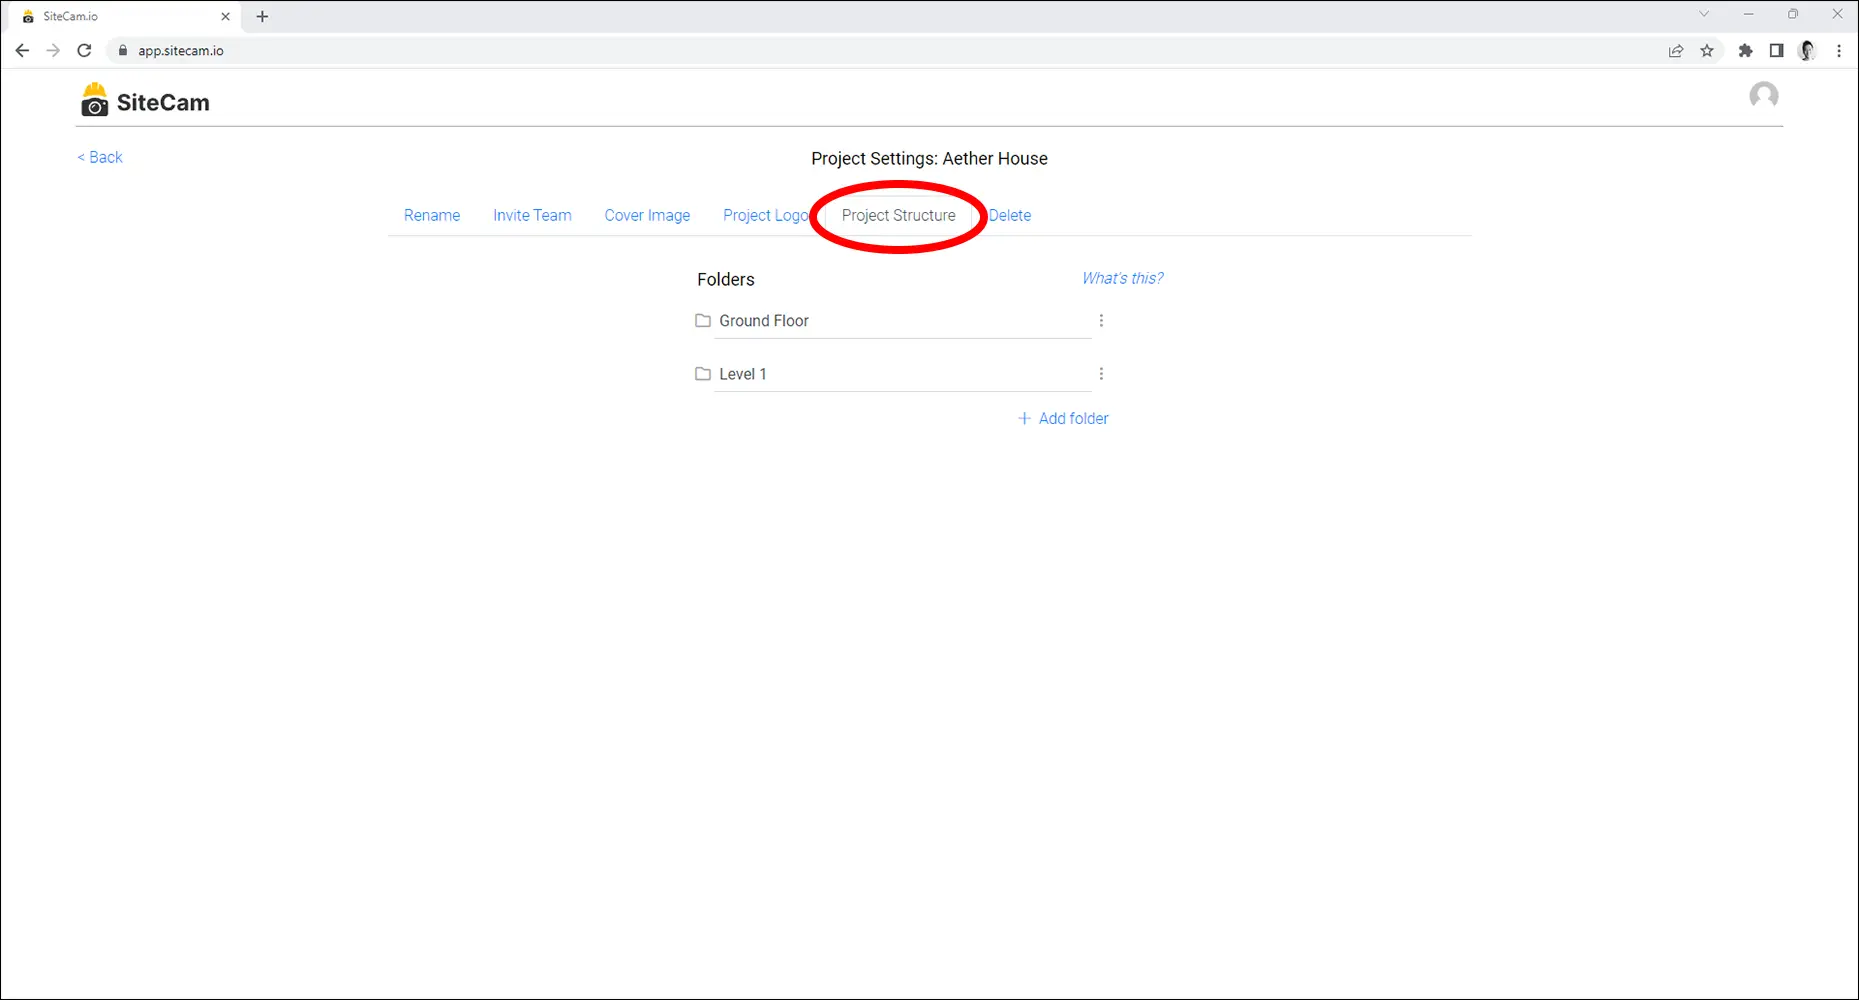
Accessing Project Settings
1. Login to the SiteCam Web App.
2. On the Projects screen, click on the Settings icon next to your project.

3. In the Project Settings, go to the Project Structure tab.
Adding a New Folder
1. Click on the + Add folder button at the bottom of your folder list.
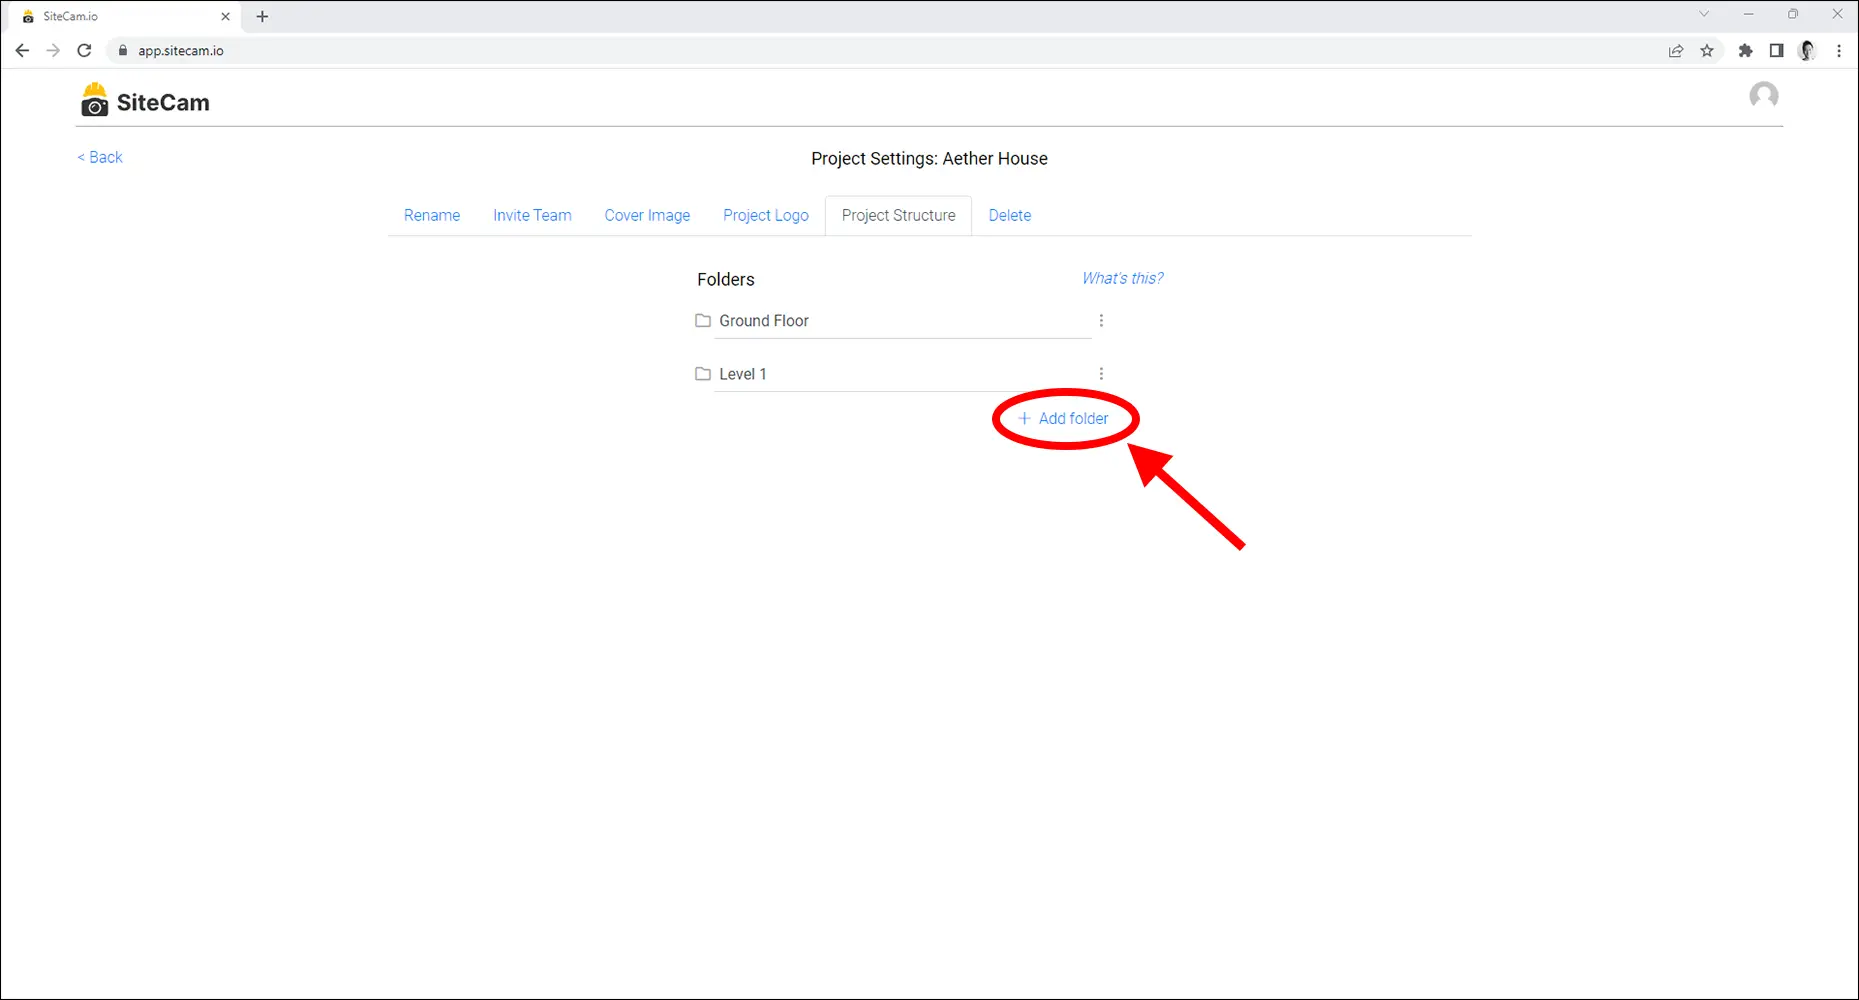
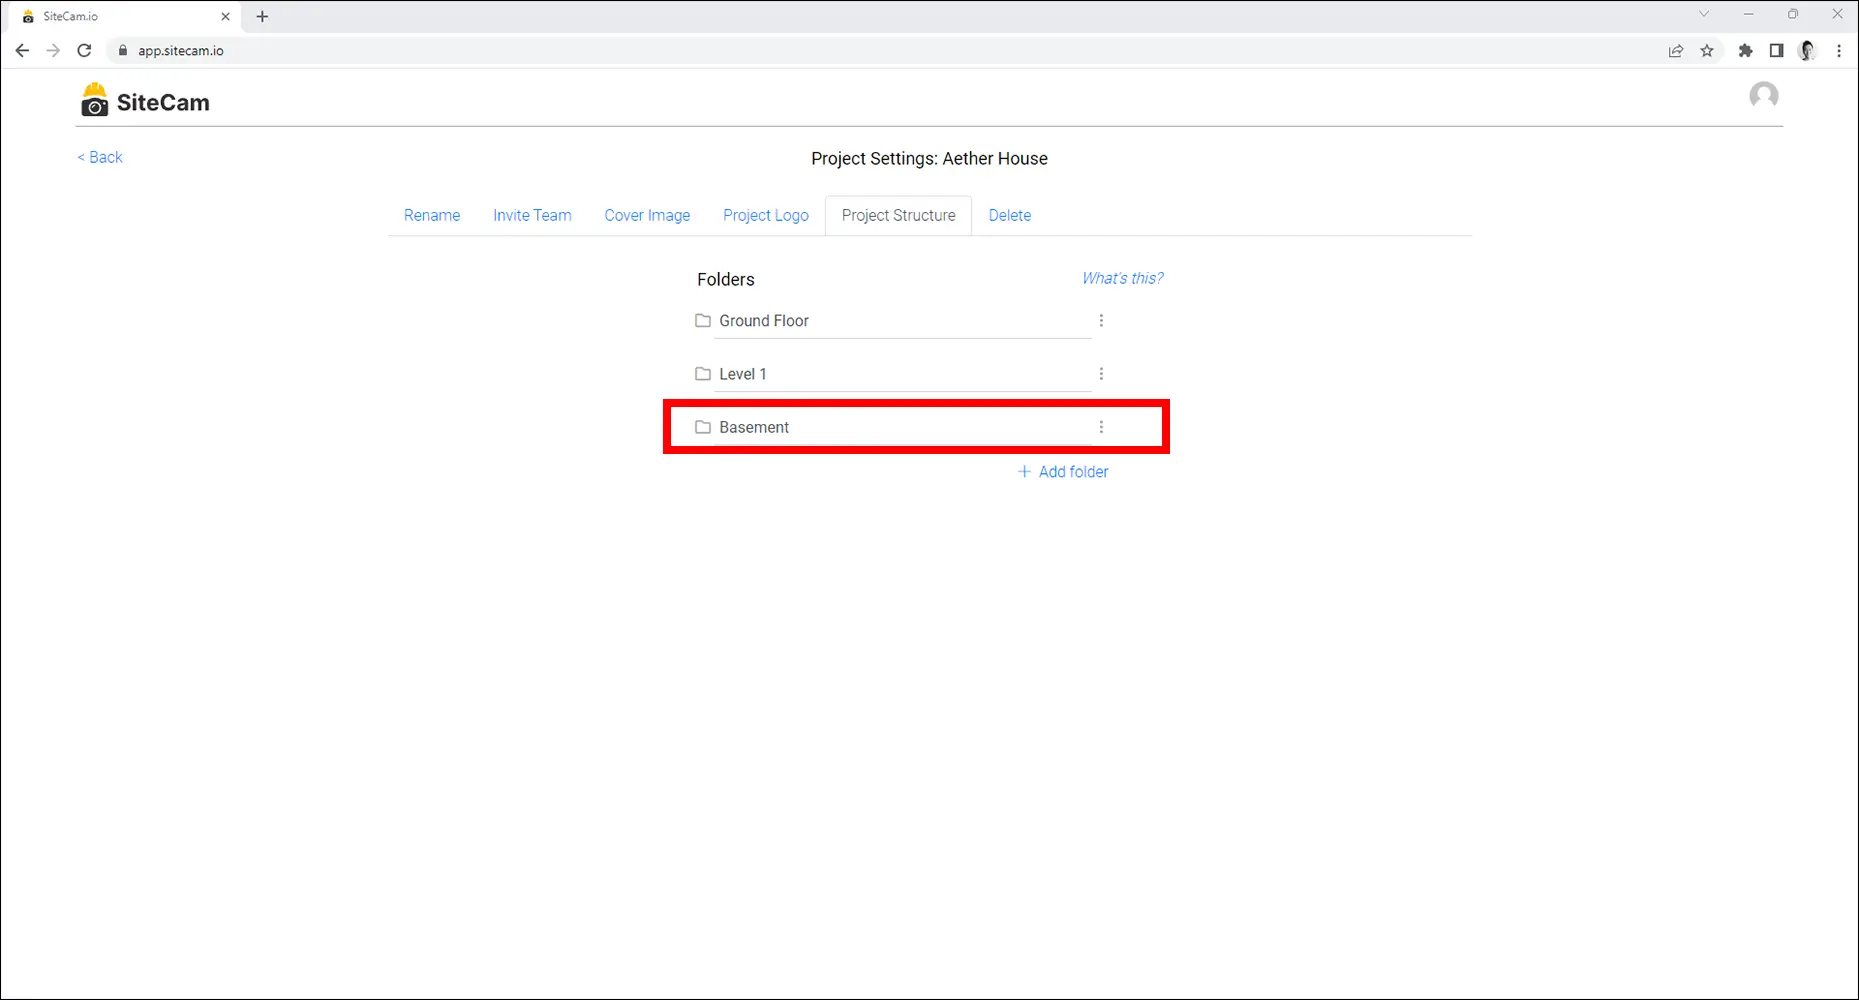
2. A new folder will be added to the bottom of the folder list. Type in a name for the new folder.
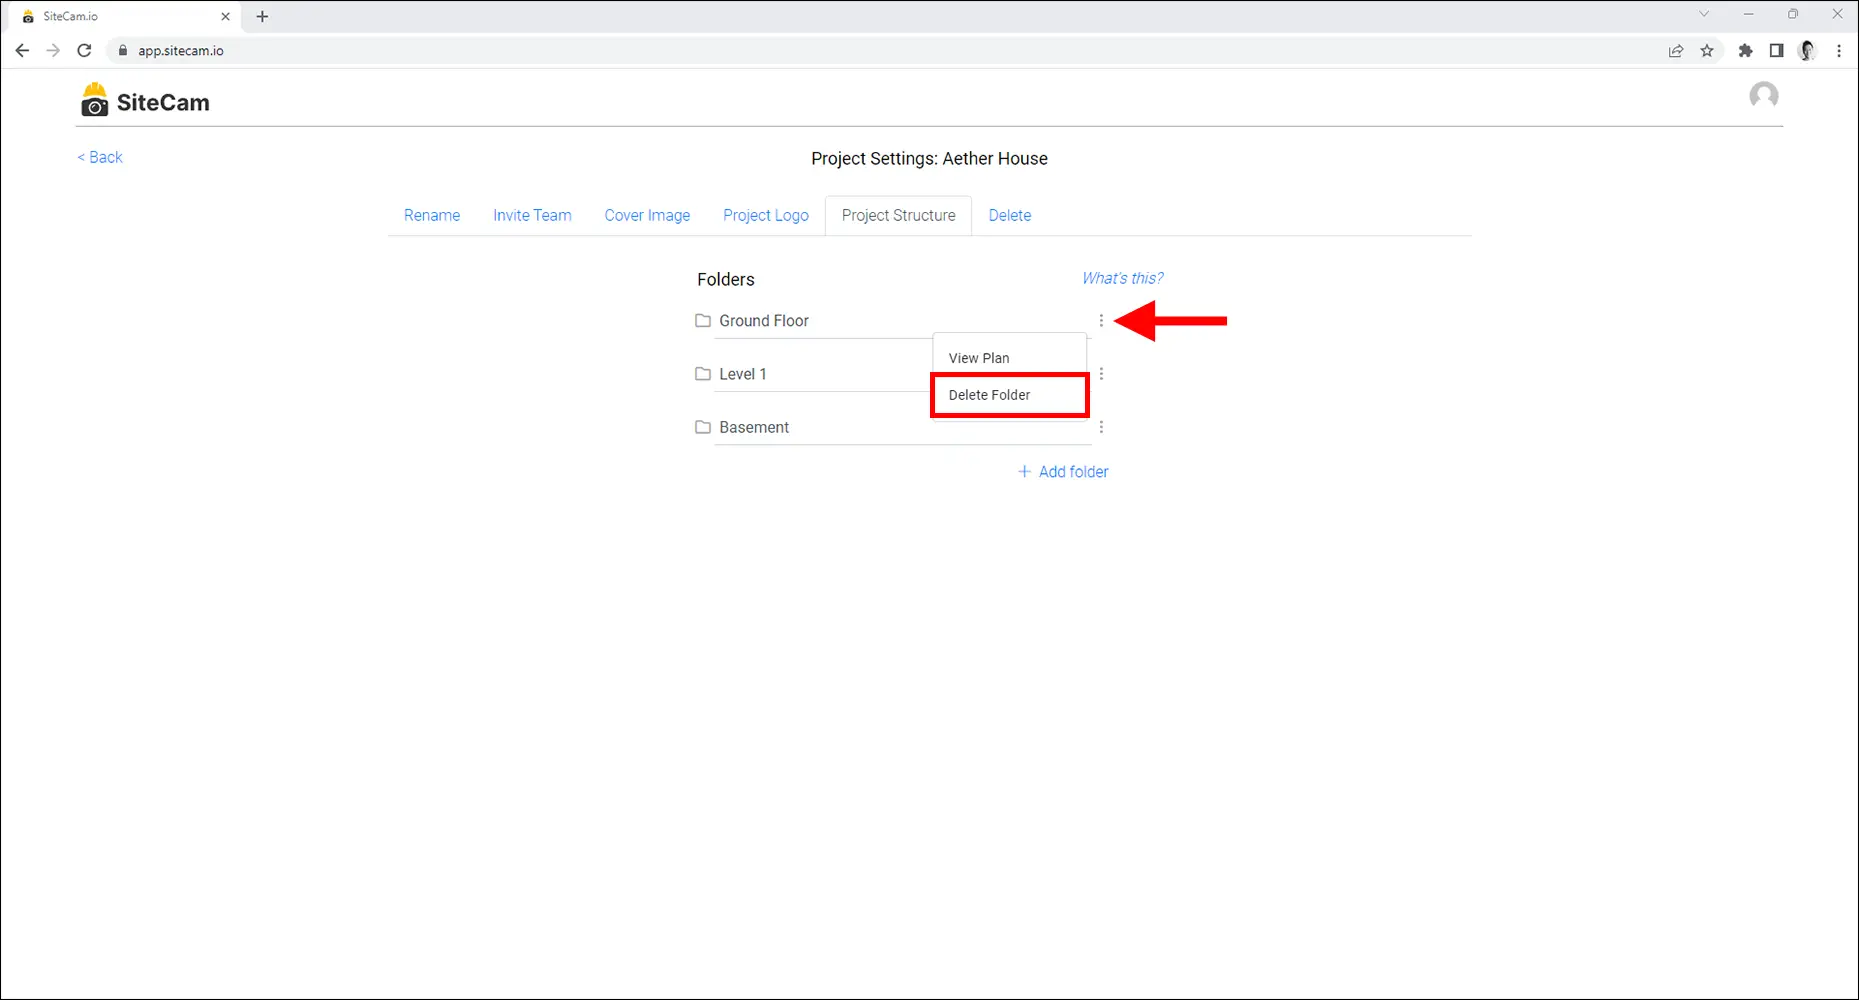
Deleting a Folder
1. To delete a folder from your project, click on the 3 dot icon next to the folder, and press the Delete Folder button.
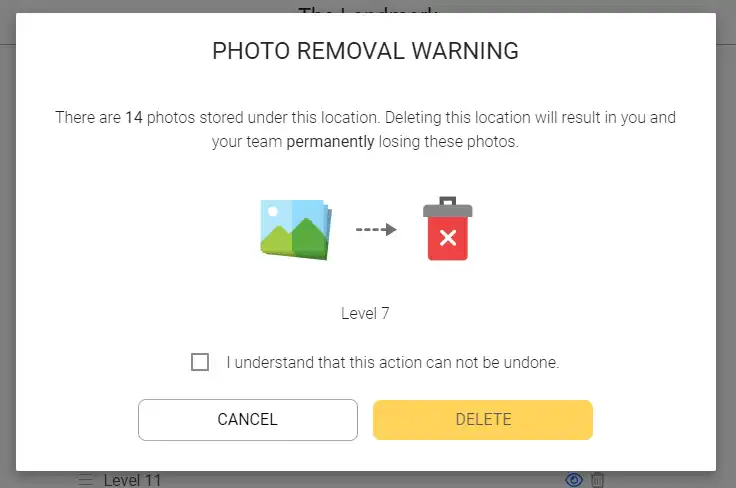
2. Click on the confirmation checkbox and press the DELETE button to proceed.
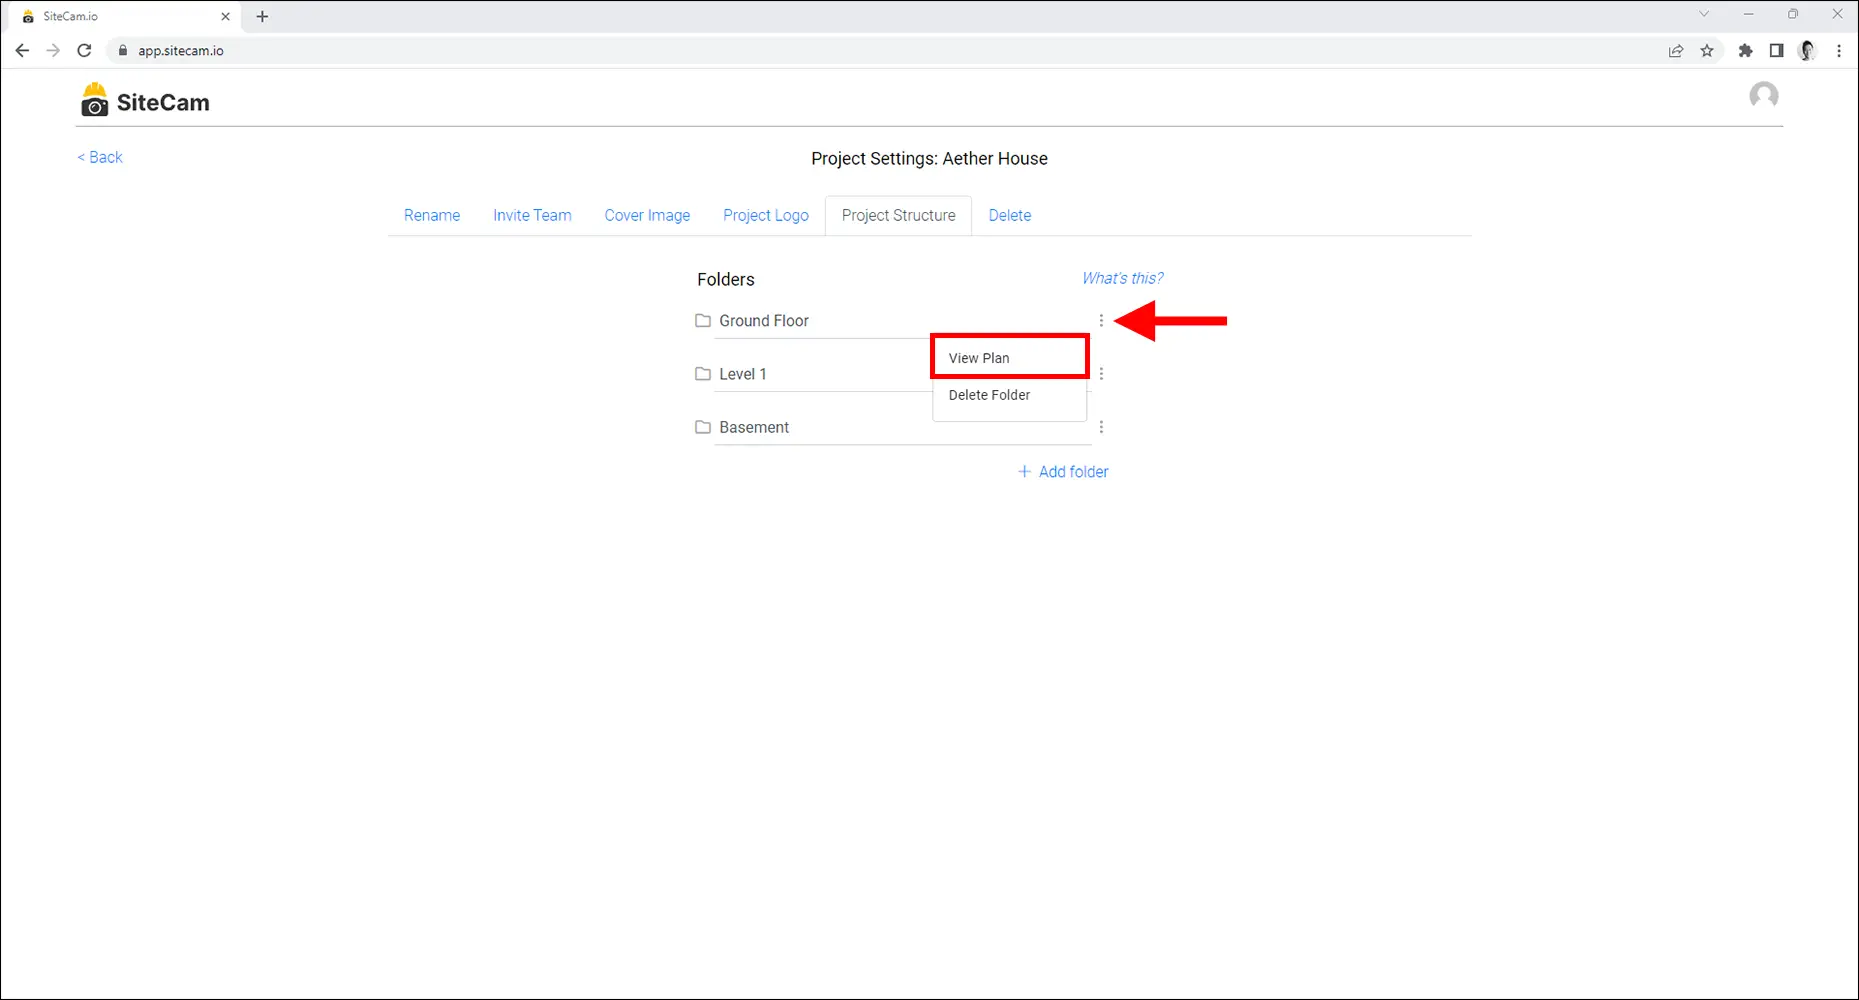
Viewing Plan on Folder
1. If your folder has a plan attached to it, you can view the plan by clicking on the 3 dot icon and pressing the View Plan button.
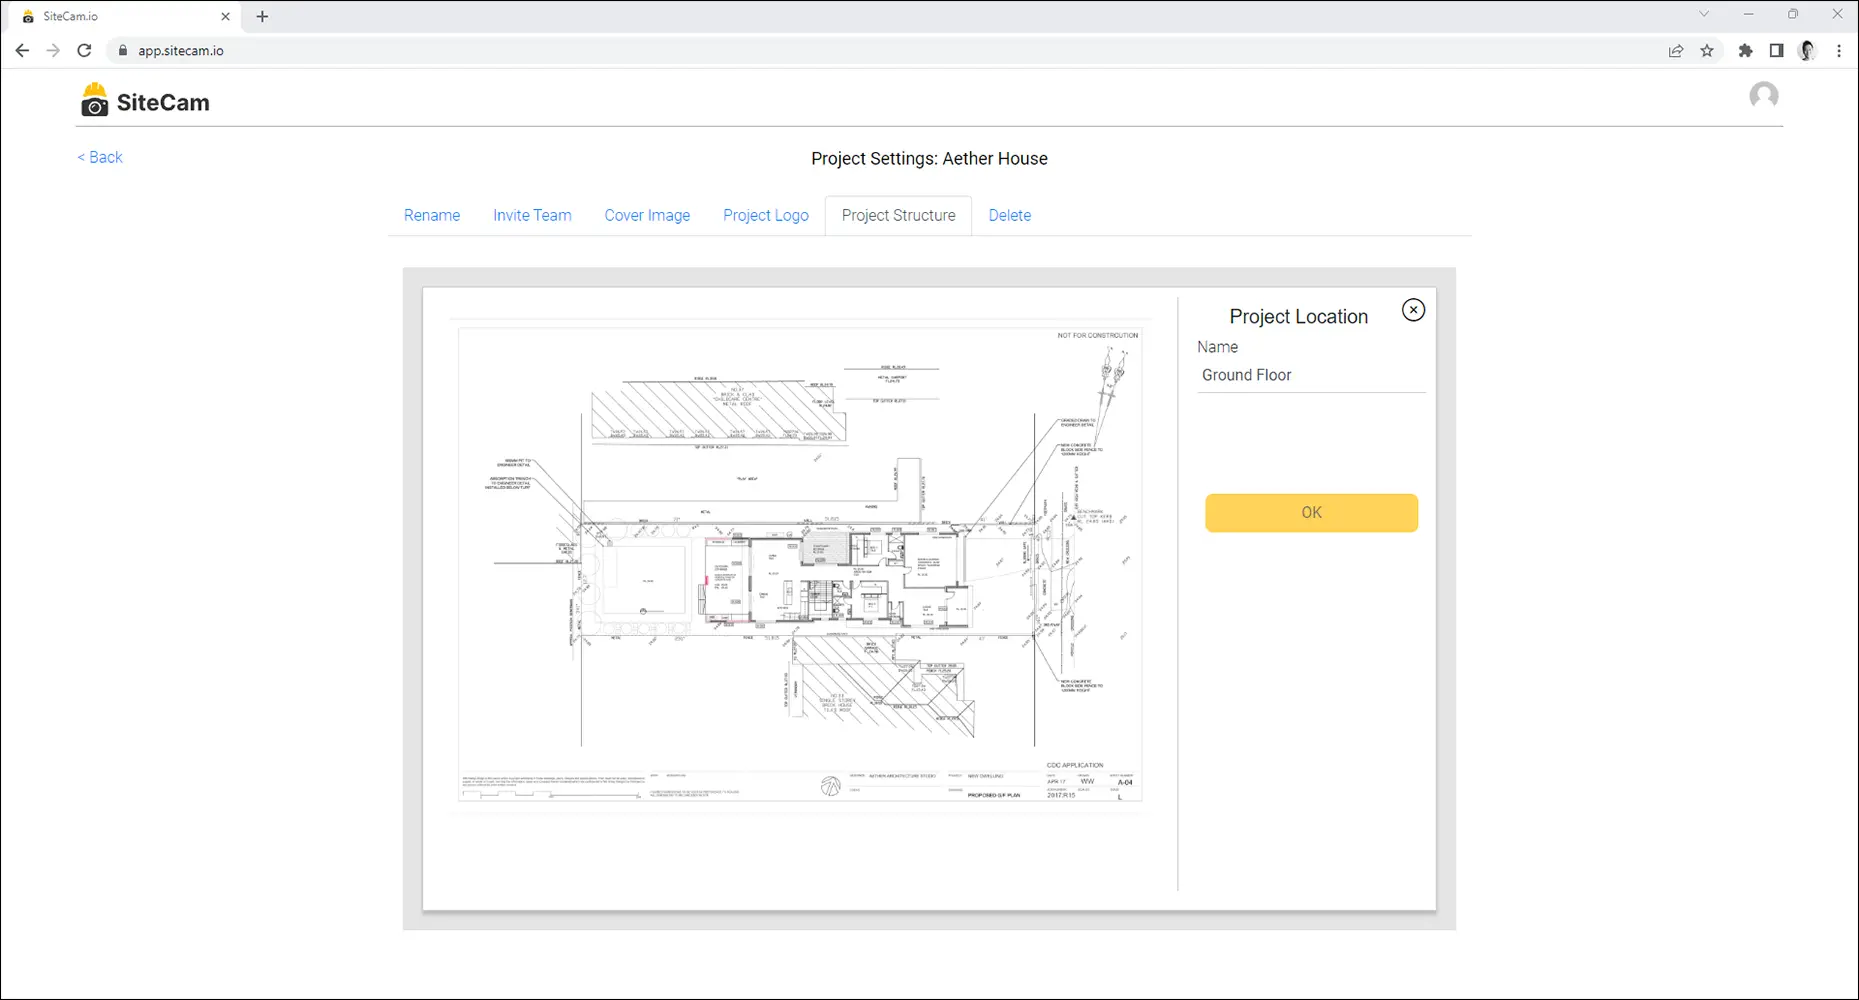
To go back, press the ( X ) button on the top right.
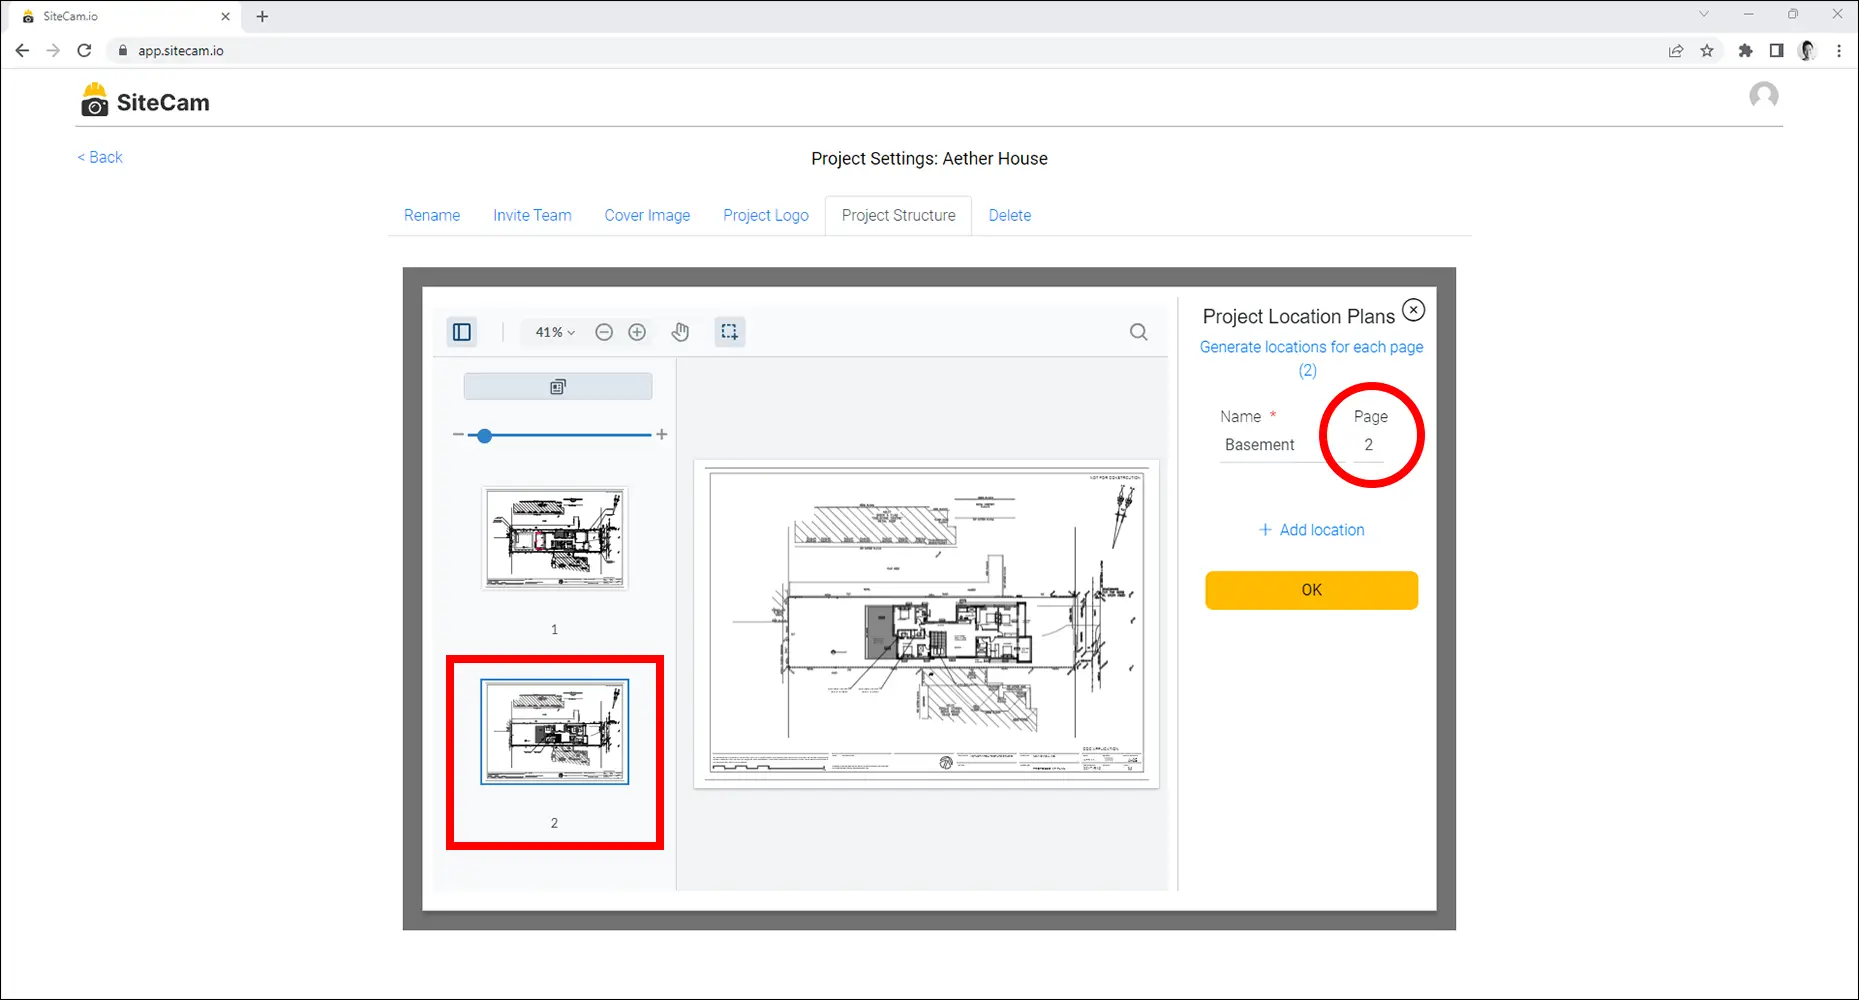
Attaching a Plan to a Folder
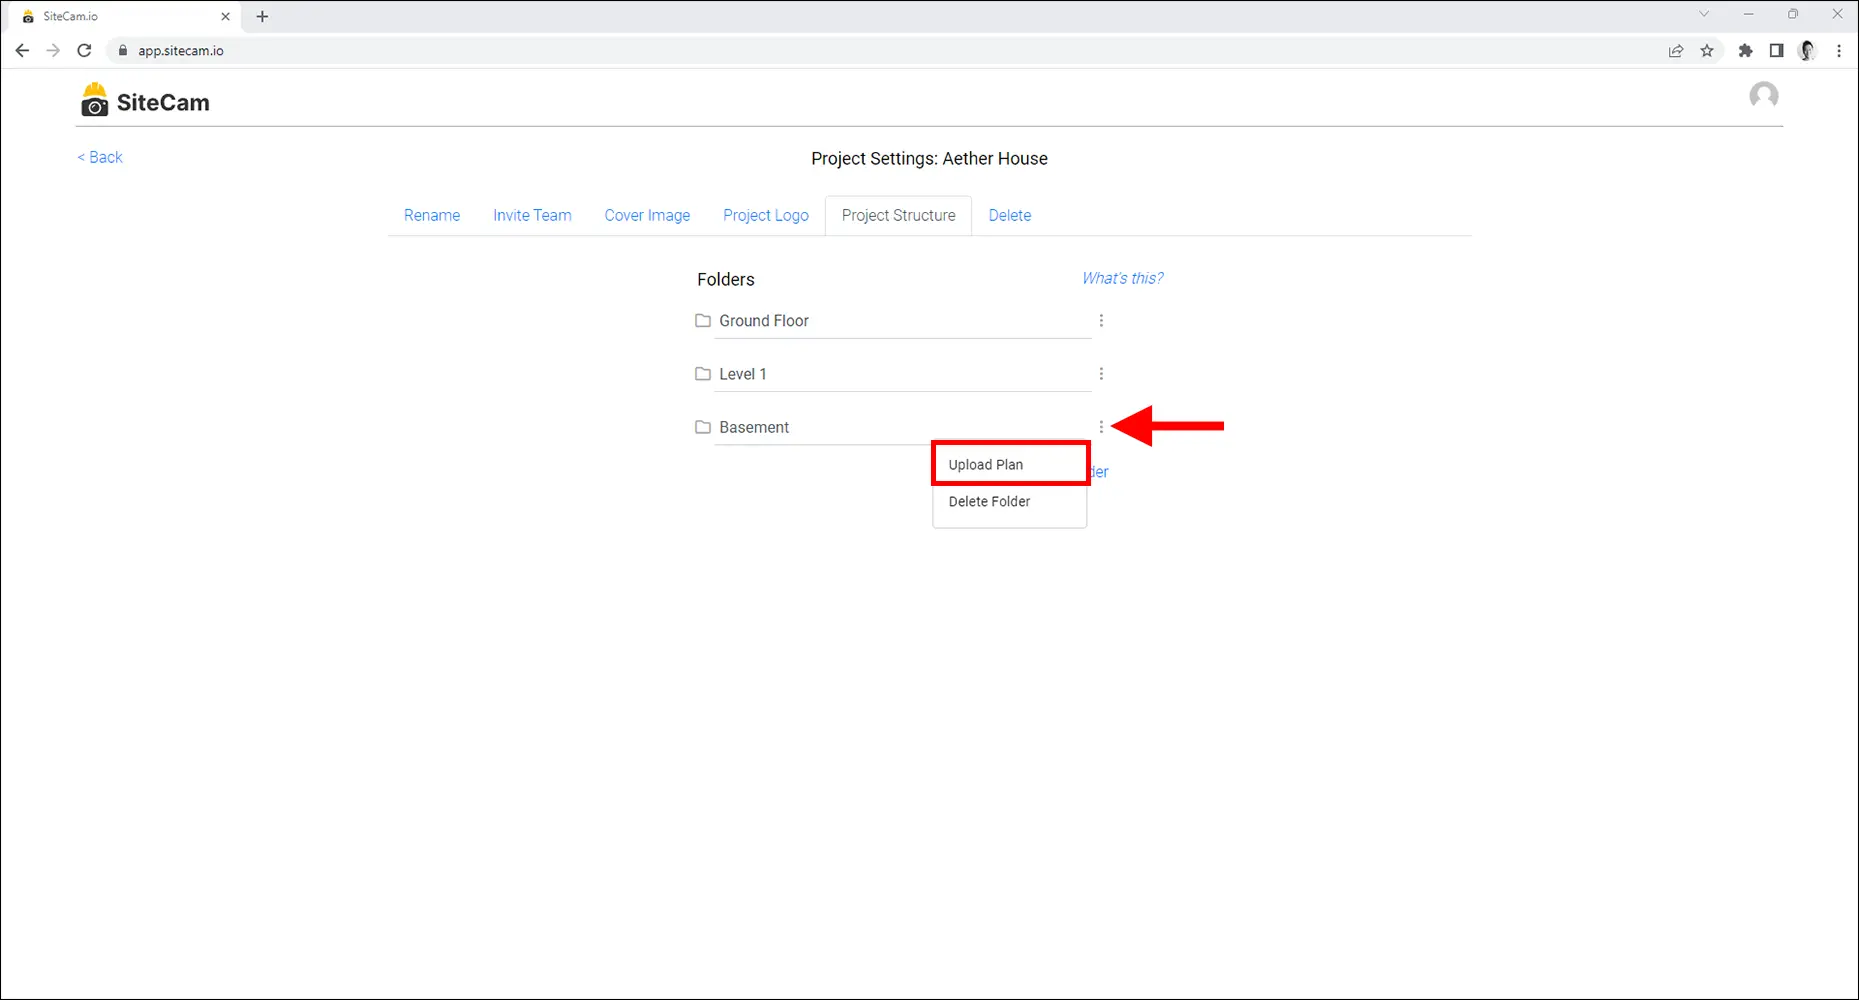
1. To attach a plan to a folder, click on the 3 dot icon next to the folder and press the Upload Plan button.
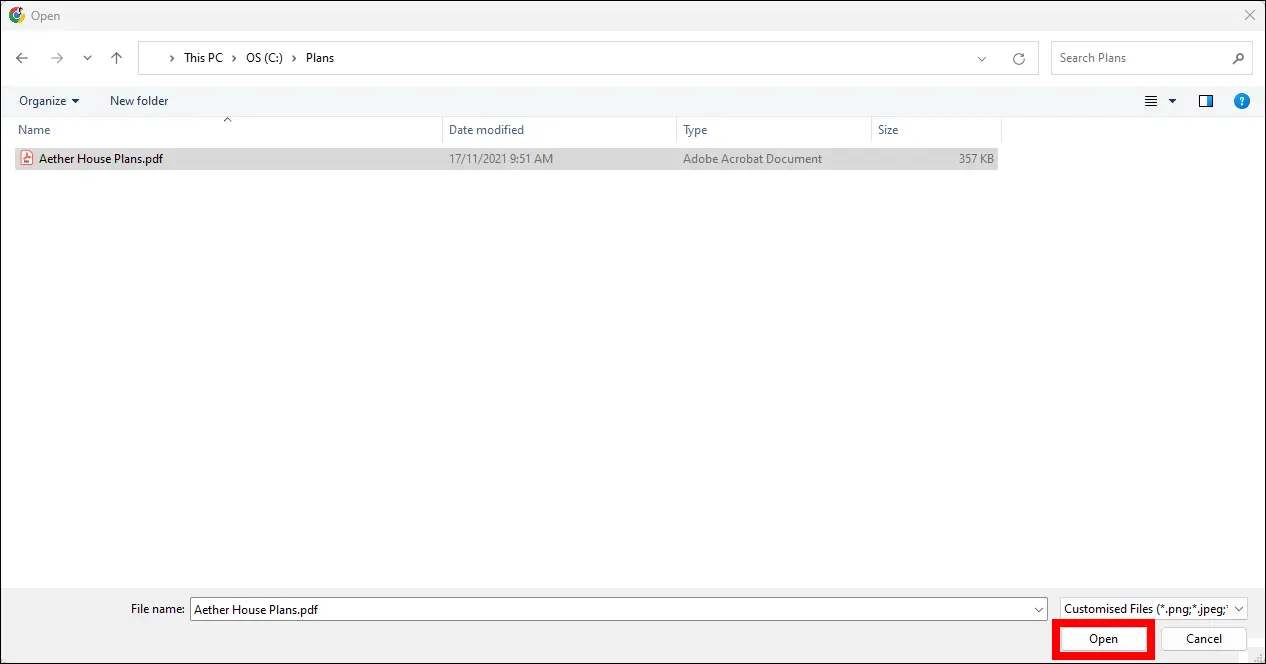
2. Navigate to where your plan is saved. Select the plan you want to attach to the folder and press the Open button.
3. If you selected a PDF with multiple pages, make sure the Page number corresponds to the plan page you want to use. Press OK to proceed.